This short document describes how to get OpenRoaming working on MikroTik devices. It contains both the Web / GUI instructions, as well as CLI instructions.
It is expected that the reader has at least a minimum amount of Mikrotik knowledge.
Prerequisites
- A Mikrotik device with:
- working Internet connectivity
- wireless
- A RADIUS proxy with RadSec support. I use radsecproxy because it Just Works.
MikroTik Configuration
Step 1 - Login
This should be fairly self explanatory - you need to connect to the device and login.
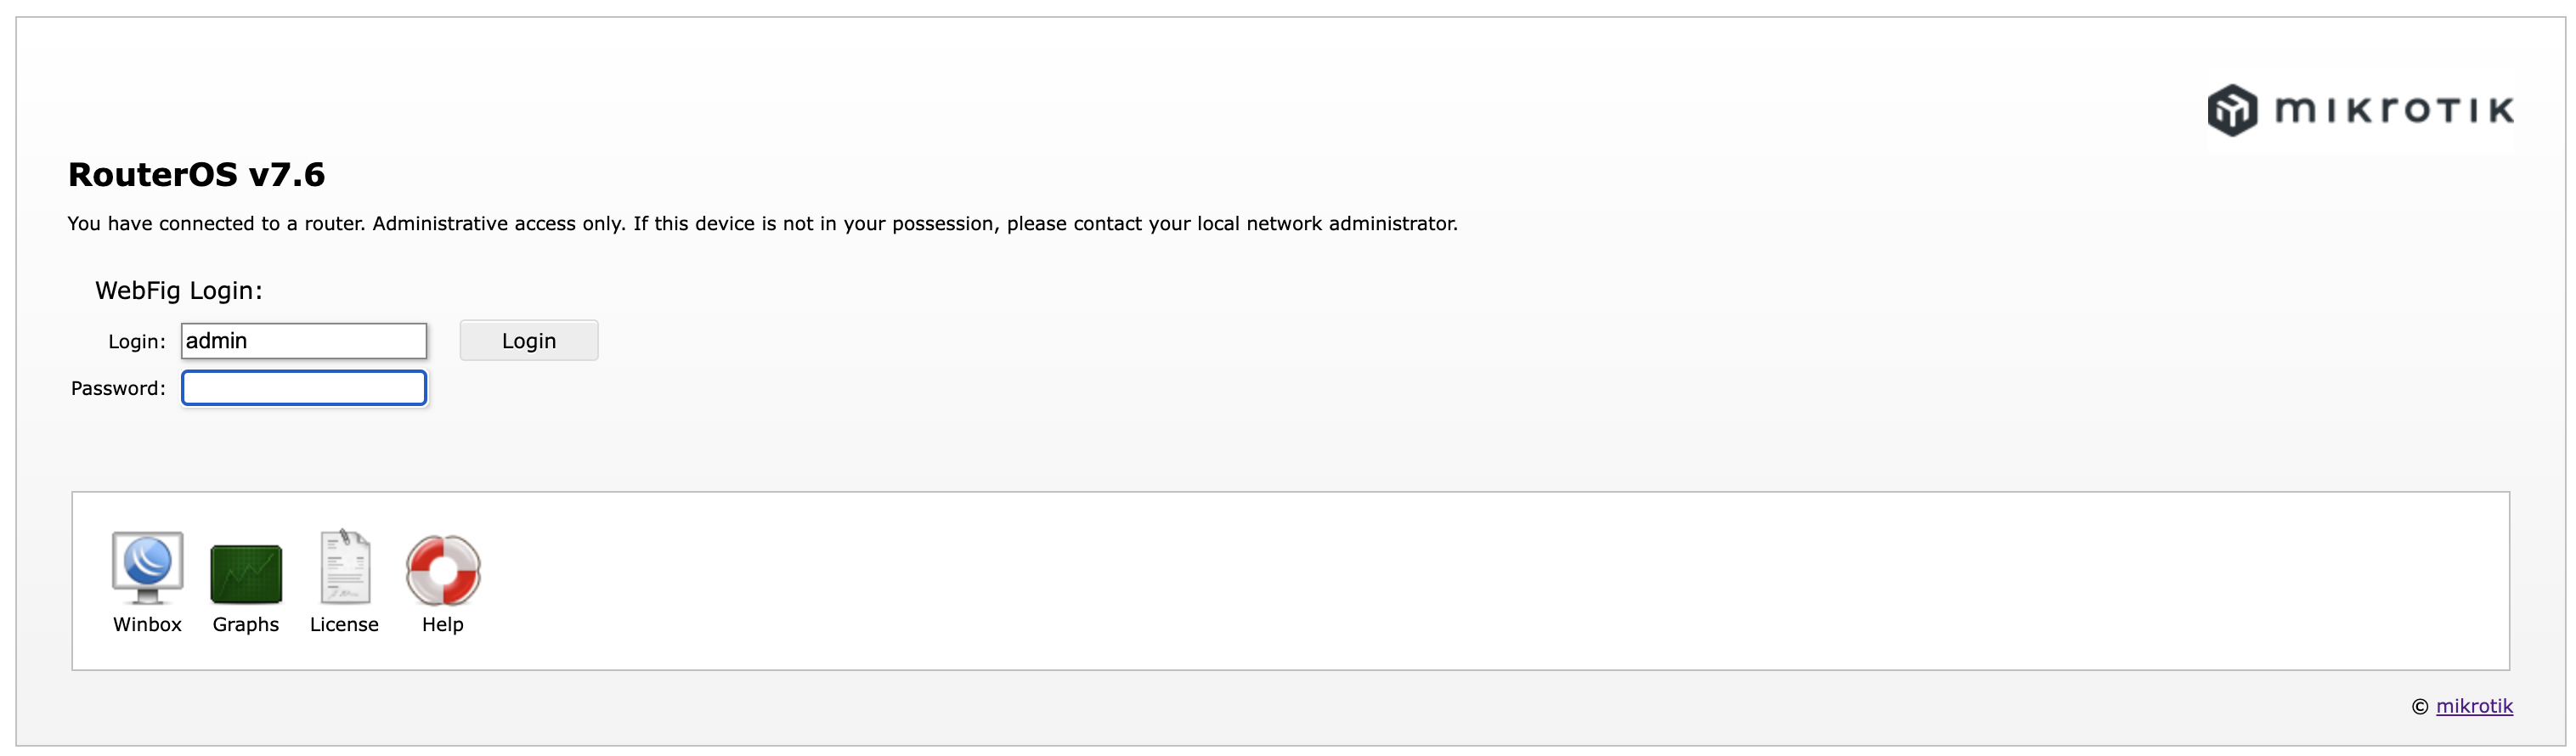
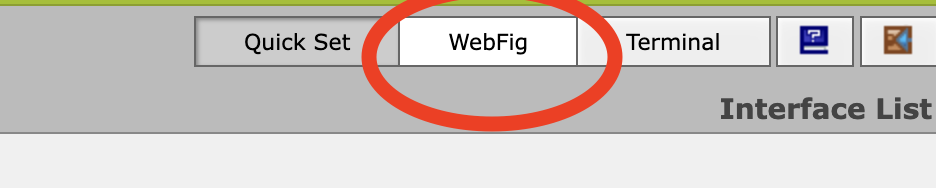
Select ‘WebFig’ to actually configure the device. Newcomers to Miktotik often assume that ‘Quickstart’ will help guide them through the setup, but it makes a config which it difficult to update / modify. It also is very restricted, and will not let you do most of the necessesary configuration.
Step 2 - Configure RADIUS on the MikroTik
This configures the MikroTik to connect to the RADIUS proxy. The RADIUS proxy will then connect to the OpenRoaming IDP. I’m assuming that you have already configured radsecproxy, if not, there is an example configuration at the end of this document.
Throughout this document, the things that you need to change are highlighted in blue (this is built into MikroTik’s web interface)
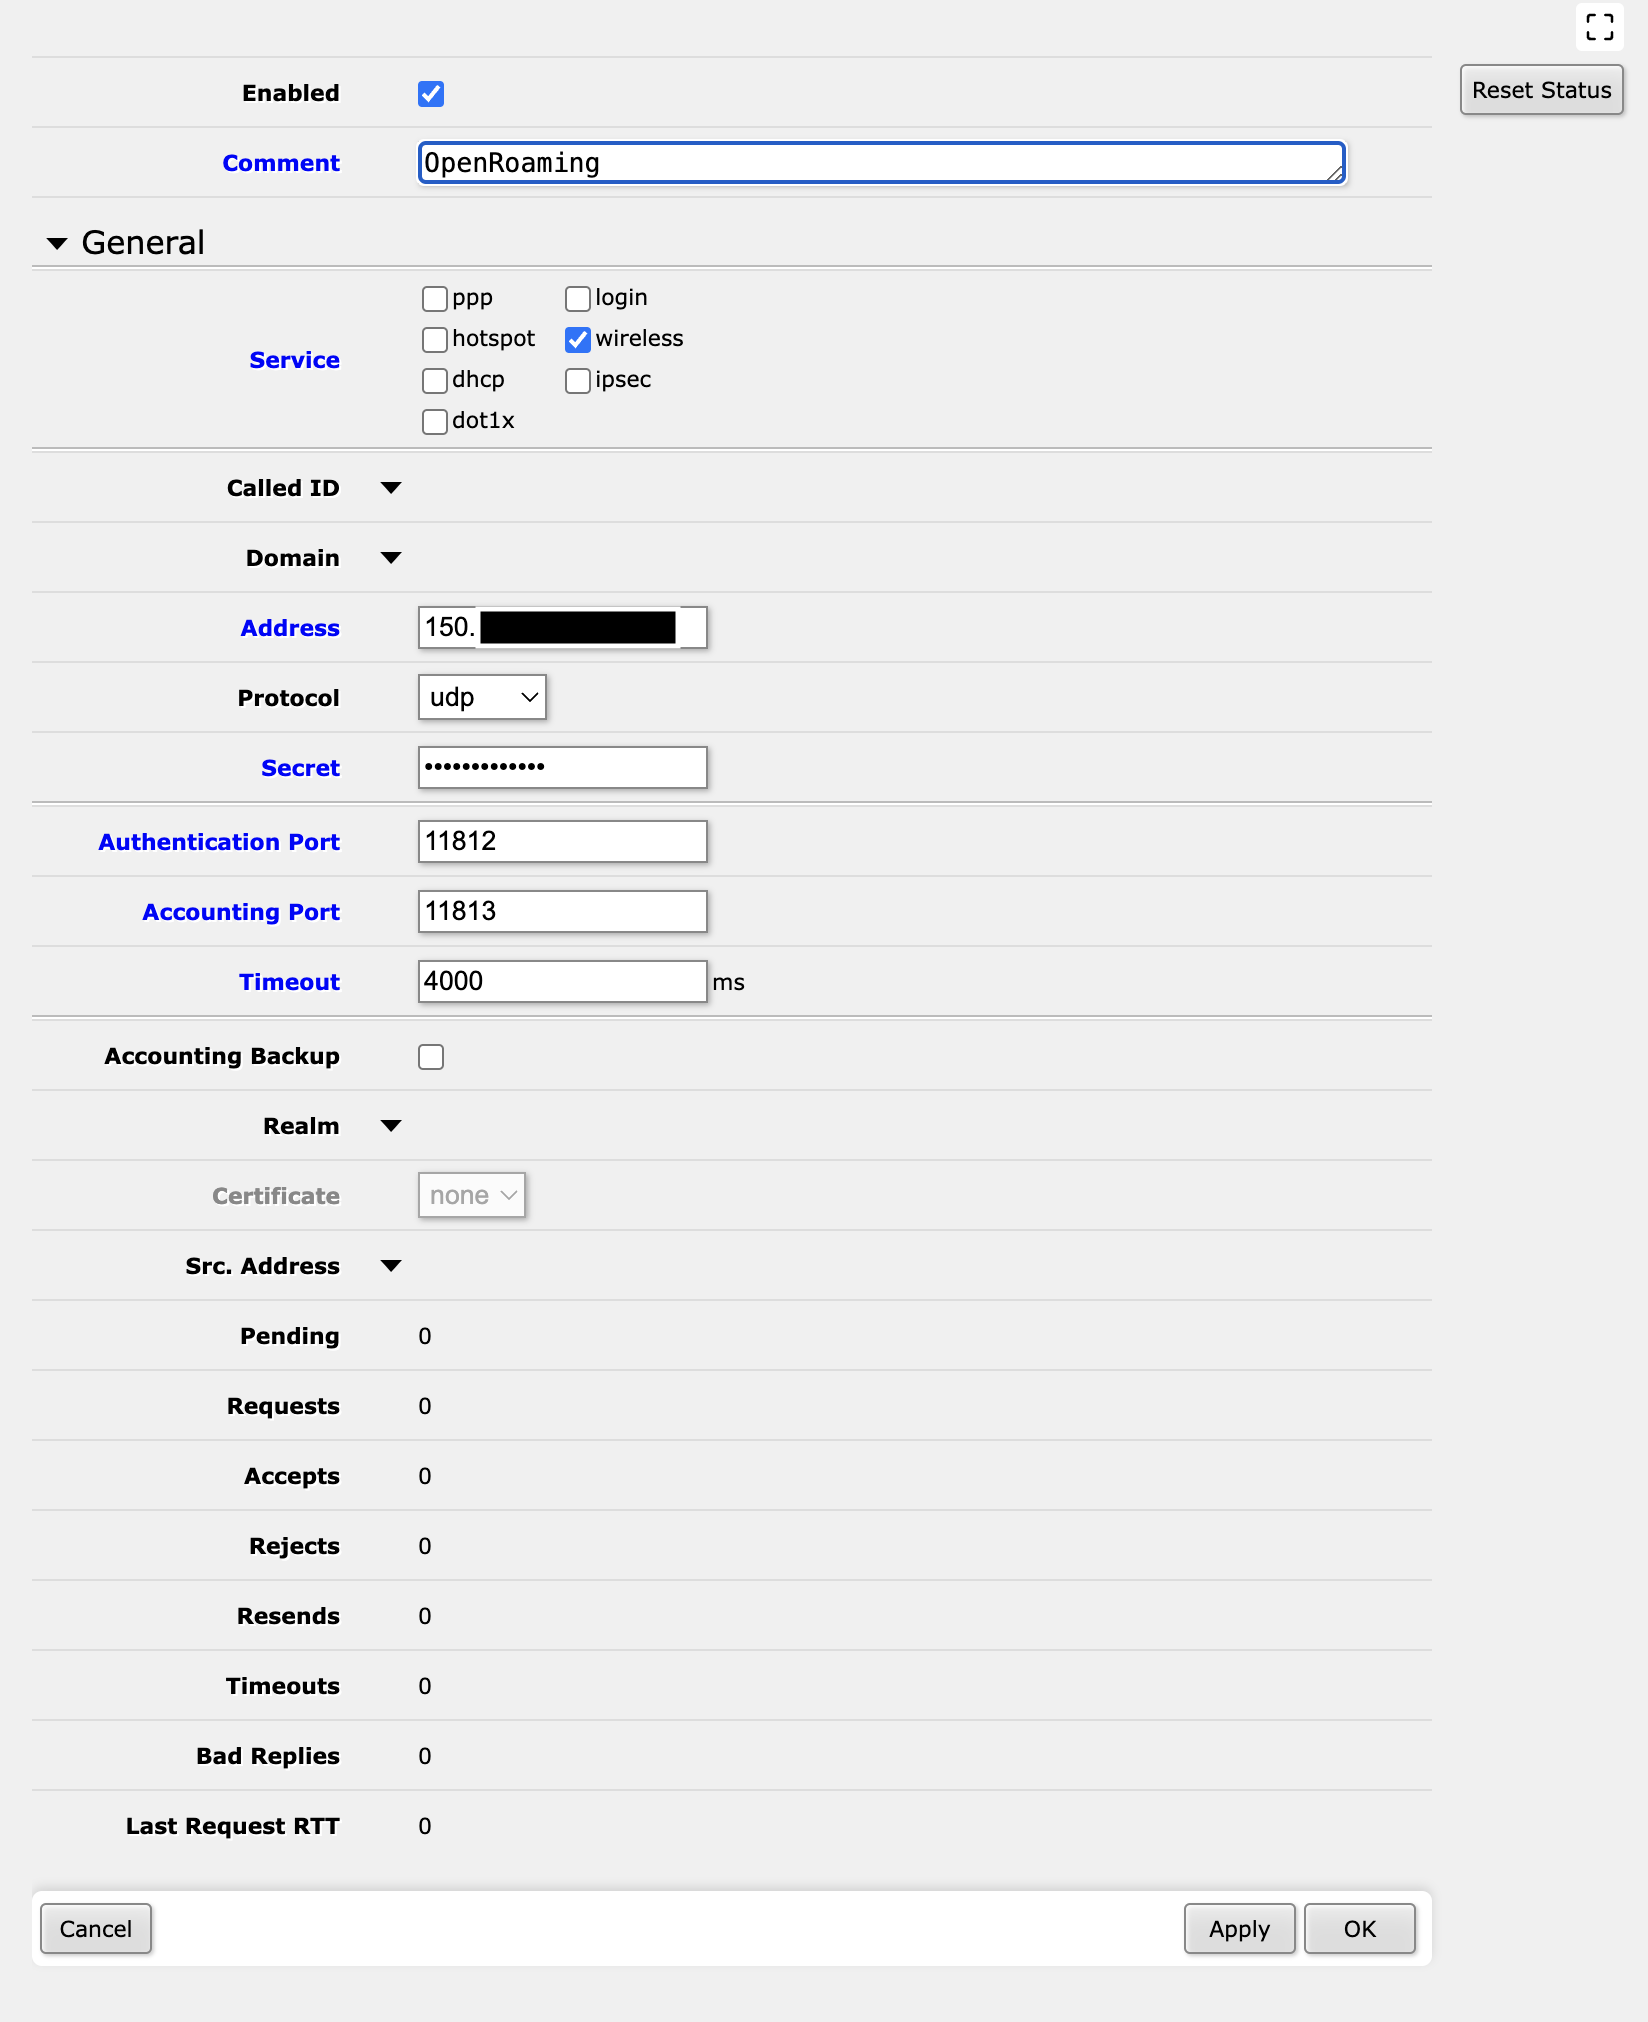
As noted below, I am using ports 11812, 11813.
As usual, the parameters that you need to change are highlighted in blue. One worth noting is the ‘Wireless’ checkbox under ‘Service’ - it’s fairly easy to miss this if you are not paying attention!
Great. You should now have a working RADIUS configuration. Moving on.
CLI Configuration:
/radius
add accounting-port=11813 address=150.[ELIDED]
authentication-port=11812 comment=OpenRoaming
secret=2e[ELIDED] service=wireless timeout=4s
Step 3 - Configure the Wireless Security Profile.
This is configured under Wireless -> Security Profiles -> New. This is the same place that you normally configure WPA2 Pre-Shared Key (PSK) security, but we need to create a profile that uses WPA2 Enterprise (WPA2-EAP).
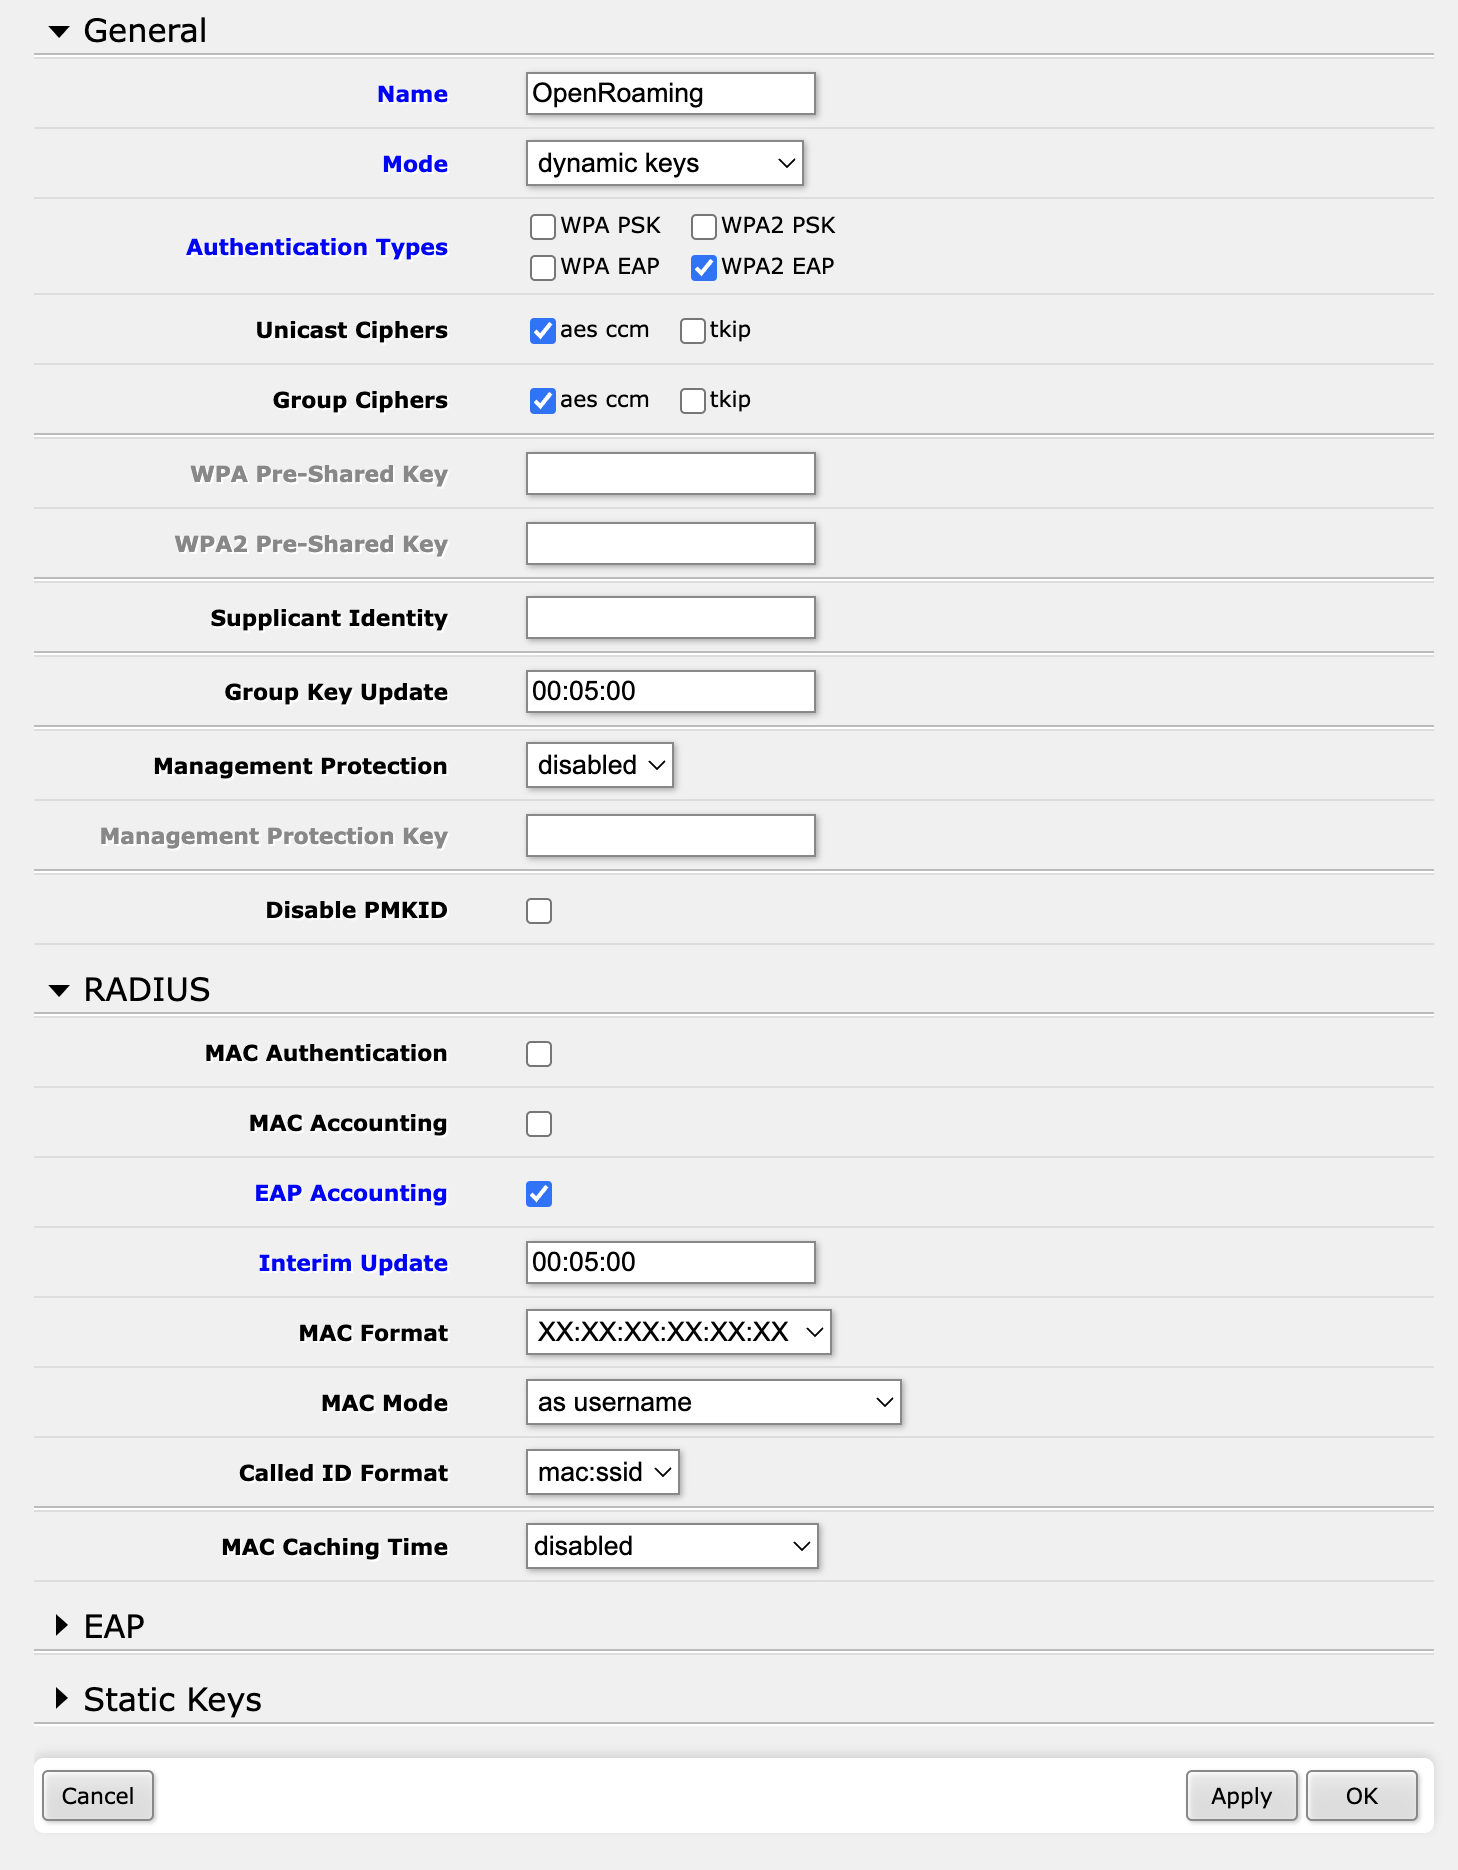
The “magic” here is that you need to choose ‘WPA2 EAP’ (Extensible Authentication Protocol) under ‘Authentication Types’, and ‘EAP Accounting’ under ‘RADIUS’. I set the ‘Interim Update’ to be ‘00:05:00’. Also set the Mode to ‘dynamic keys’. This means that the MikroTik will send an accounting update every 5 minutes. This is important for OpenRoaming, as it uses the accounting updates to figure out when a user has left the network.
CLI Configuration:
/interface wireless security-profiles
add authentication-types=wpa2-eap
interim-update=5m mode=dynamic-keys name=OpenRoaming
radius-eap-accounting=yes supplicant-identity=""
Step 4 - Configure OpenRoaming / Passpoint
So far we have just been configuring the MikroTik to talk to the RADIUS proxy. Now we need to configure the MikroTik to advertise OpenRoaming in the Beacons, configure IEEE 802.11u, ANQP, Roaming OIS and a bunch of other acronyms too…
This is done under Wireless -> Internetworking Profiles.
Click on ‘New’ to create a new profile.
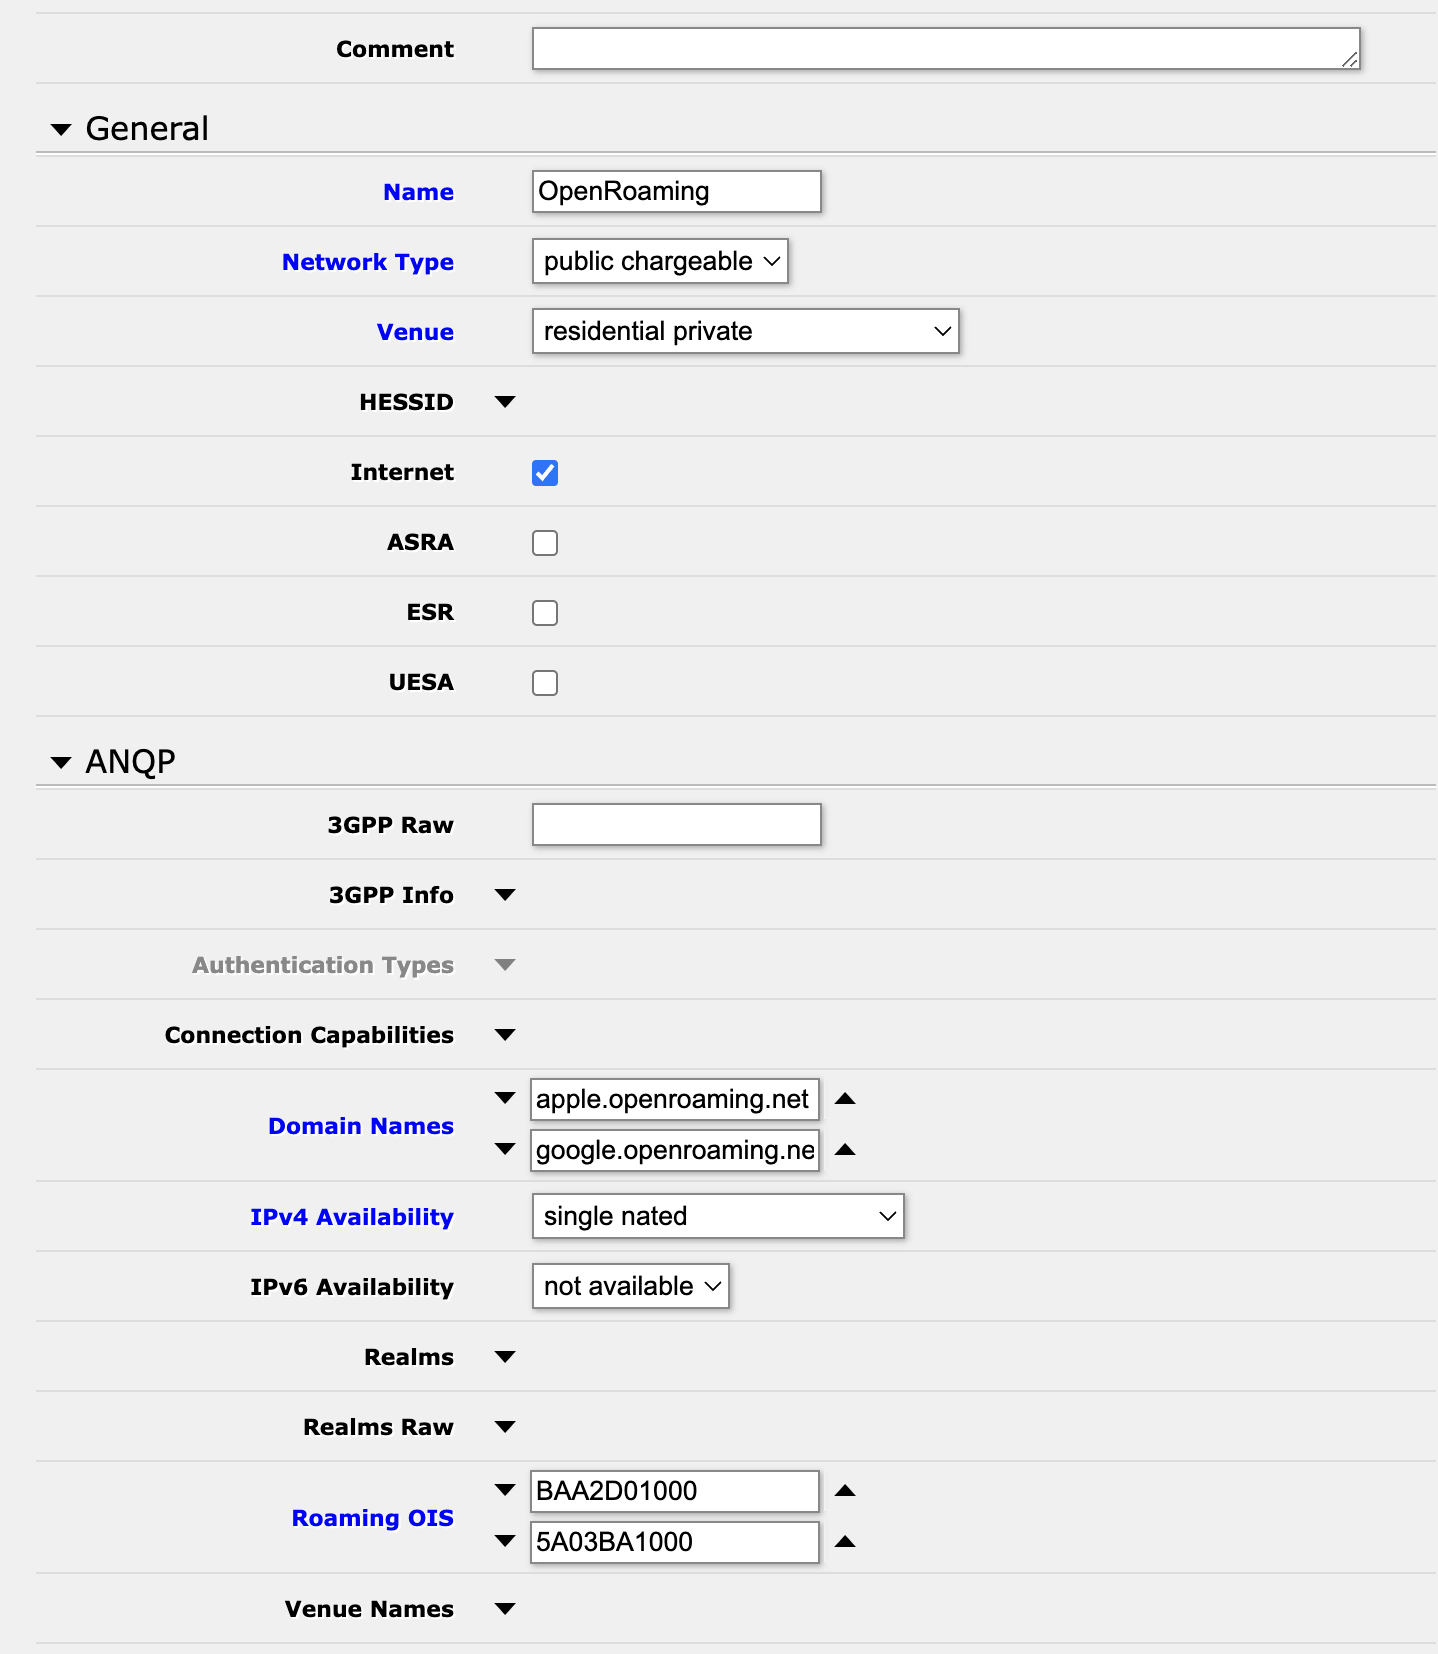
This is where you will need perform the most customization to match your deployment.
I configured this demo at home, and so I selected ‘residential private’ as the ‘Venue’ type, and ‘single nated’ as the ‘IPv4 Availability’. I have residential Comcast connectivity, and so I cannot (usefully) provide IPv6 connectivity to my guests, and so I have left the default of “No IPv6”. Make sure that you also select ‘Internet’ (assuming, of course, you are actually providing Internet connectivity).
The list of ‘Domain Names’ will vary based on your deployment - with this configuration I’m allowing people authenticated through Google and Apple to connect to my network.
Now for the more tricky bits – the ‘Roaming OIS’. The terminology here is somewhat confusing. This will allow you to advertise 24-bit roaming Organization Unique Identifiers (OUI) and / or 36-bit Roaming Consortium Identifier (RCOI).
Here I am advertising:
- BAA2D01000 - OpenRoaming, Settled (Paid), Any Identities, A Permanent ID will be returned by the IDP (Users are identified, email)
- 5A03BA1000 - OpenRoaming, Settlement-Free (Free), Any Identities, A Permanent ID will be returned by the IDP (Users are identified, email)
Note that this configuration will log the email address of people connecting to your OpenRoaming network:

Hotspot 2.0/Passpoint used 24-bit IEEE assigned OUIs to identify the roaming consortium, but, annoyingly, I wasn’t able to find a public list of consortia.
The encoding of RCOIs is somewhat weird, because things don’t really align on byte boundaries. It is described in draft-tomas-openroaming - “WBA OpenRoaming Wireless Federation” (work in progress). The 24-bit IEEE assigned OUIs are extended to 36-bit OUI-36s, with the octets 4 and 5 used to encode the LoA, QoS, PID, ID-Type, etc. I used to manually set bits and then shift them, but have just discovered the WBA OpenRoaming Configurator tool which makes this much easier.
CLI Configuration:
/interface wireless interworking-profiles
add domain-names=apple.openroaming.net,google.openroaming.net,
ipv4-availability=single-nated
name=OpenRoaming network-type=public-free
roaming-ois=AA146B0100,BAA2D00100,BA03BA0100
venue=residential-private
Step 5 - Configure the Wireless Interface
Finally, we are on the home stretch. We need to configure the wireless interface to use the security profile and internetworking profile that we just created.
I didn’t want to change my primary network to advertise OpenRoaming, so I created a new interface called ‘OpenRoaming’. This is done under Wireless -> Interfaces -> New.
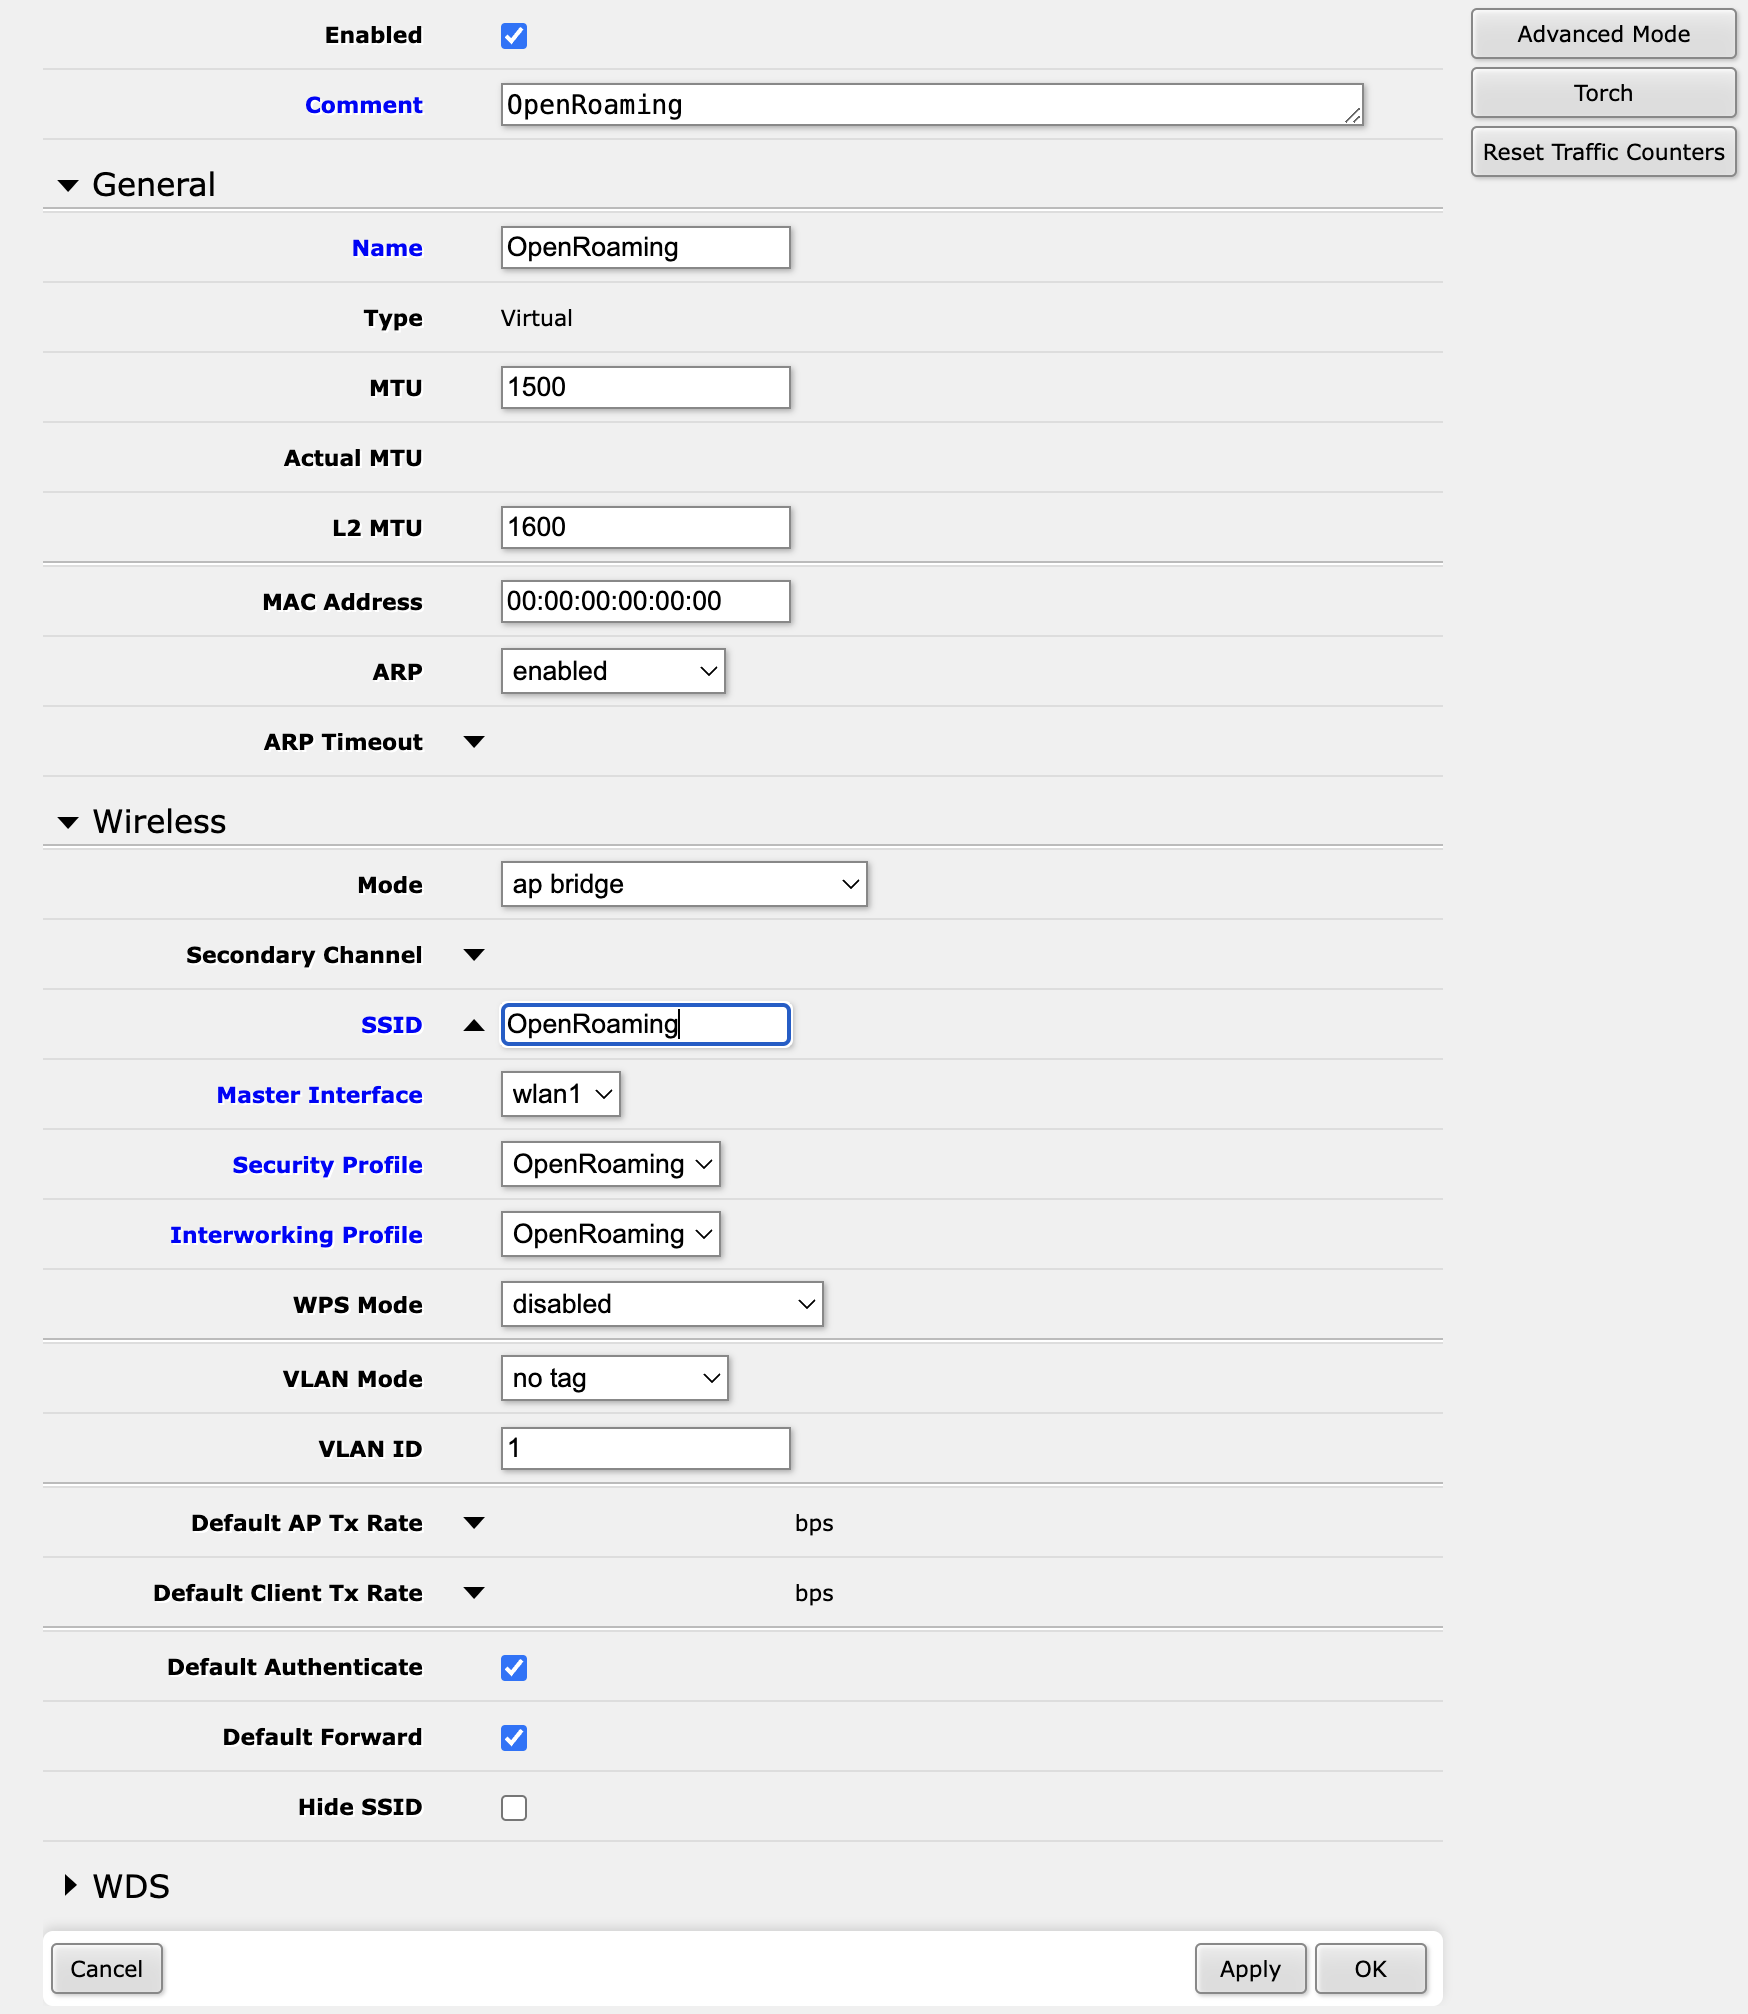
The important things to note here are:
- The ‘Mode’ is set to ‘ap-bridge’
- The ‘Security Profile’ is set to the profile that we created in Step 3
- The ‘Internetworking Profile’ is set to the profile that we created in Step 4
- The ‘SSID’ is set to the SSID that you want to advertise
- The ‘Frequency’ is set to the frequency that you want to advertise on. I’m using 2.4GHz, but you can use 5GHz if you want.
Remember to make sure that this network actually works (gets an IP address, that people connecting can reach the Internet, etc). I’ve found it easiest to first create the interface with a “normal” (WPA-PSK), known-working Security Profile and no Internetworking Profile, test it, and then enable the Security and Internetworking Profiles. If you do this, remember to “forget” the network in your phone when changing these, or your device will likely be confused.
CLI Configuration:
/interface wireless
add comment=OpenRoaming interworking-profile=OpenRoaming
mac-address=4A:A9:8A:19:F4:E2 master-interface=wlan1
name=OpenRoaming security-profile=OpenRoaming
ssid=OpenRoaming wds-default-bridge=bridge
wps-mode=disabled
Done!
Everything should now be working. Install an OpenRoaming client on your phone / test device, and connect to whatever SSID you have enable OpenRoaming on.
Login to the RADSEC proxy and check the logs (sudo journalctl -feu radsecproxy) to make sure that everything is working as expected:
Radsecproxy Configuration
I install radsecproxy on a Debian 10 style system. The configuration is fairly simple, and is shown below. Note that you need a validly signed certificate from the WBA OpenRoaming CA. This document does not go into how you generate the Certificate Signing Request (CSR), get it signed, etc.
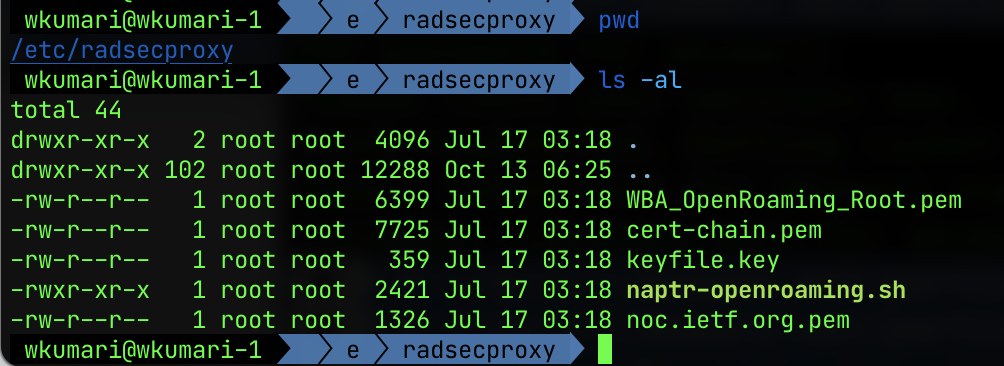
Certificate and Keys
The certificates and keys go in a directory called /etc/radsecproxy:
Actual radsecproxy configuration
I have configured my radsecproxy to listen on port 11812 and 11813. This makes it somewhat easier for me to debug (and I was already using 1812 and 1813 for other things).
The LogLevel parameter is very useful to debug what is actually happening,
but the logs can grow quite large, so I’ve bumped it back down to 3.
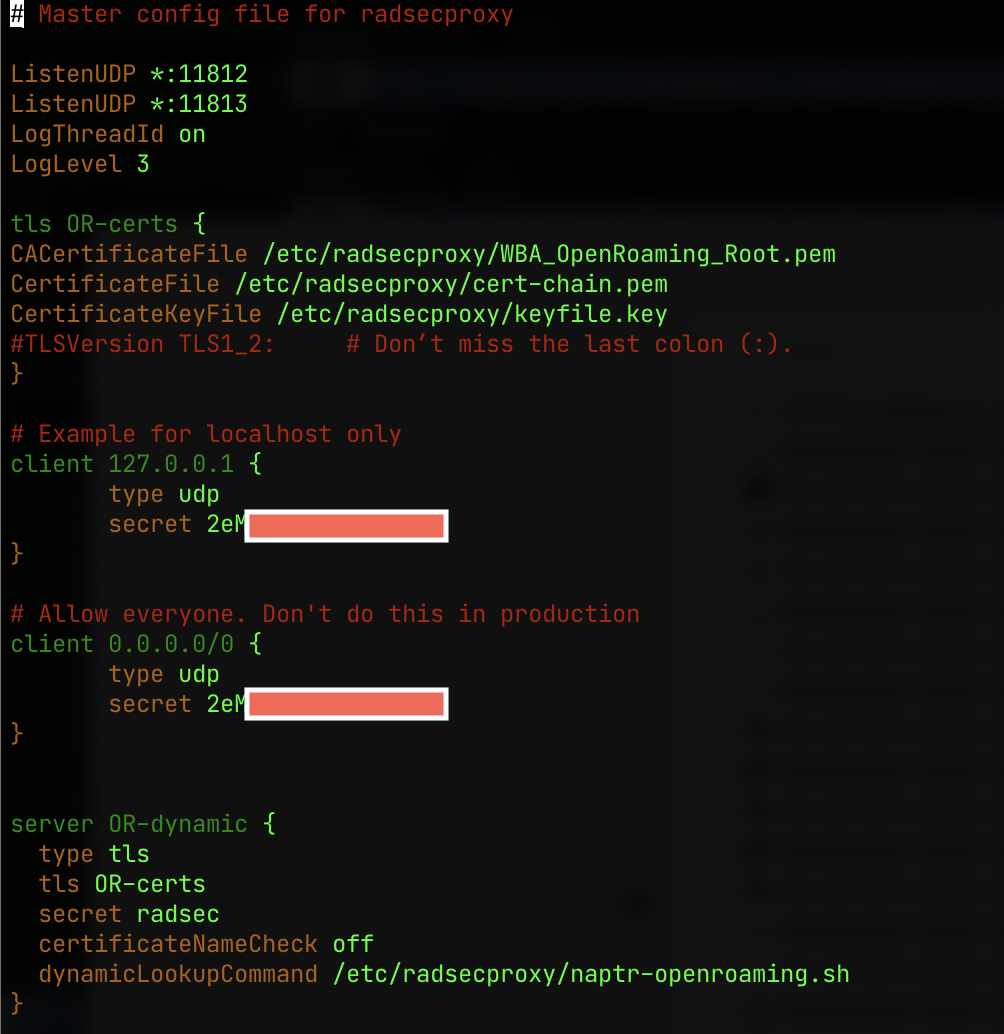
The dynamicLookupCommand is what does the magic of looking up the realm in
the OpenRoaming DNS. The dynamicLookupCommand is a script that is called by
radsecproxy to figure out the IDP to use. This needs to be executable by the
user that radsecproxy runs as.
